This feature is a paid add-on. If it is not enabled for your account, the option will not appear in your navigation. Contact your Customer Success Manager for pricing and availability.
Go to CARET Legal
1. Begin Tutorial
This tutorial guides you through managing time entries in the CARET Legal Dashboard. You will learn how to review backlogs, create entries, and navigate the timekeeping center efficiently.
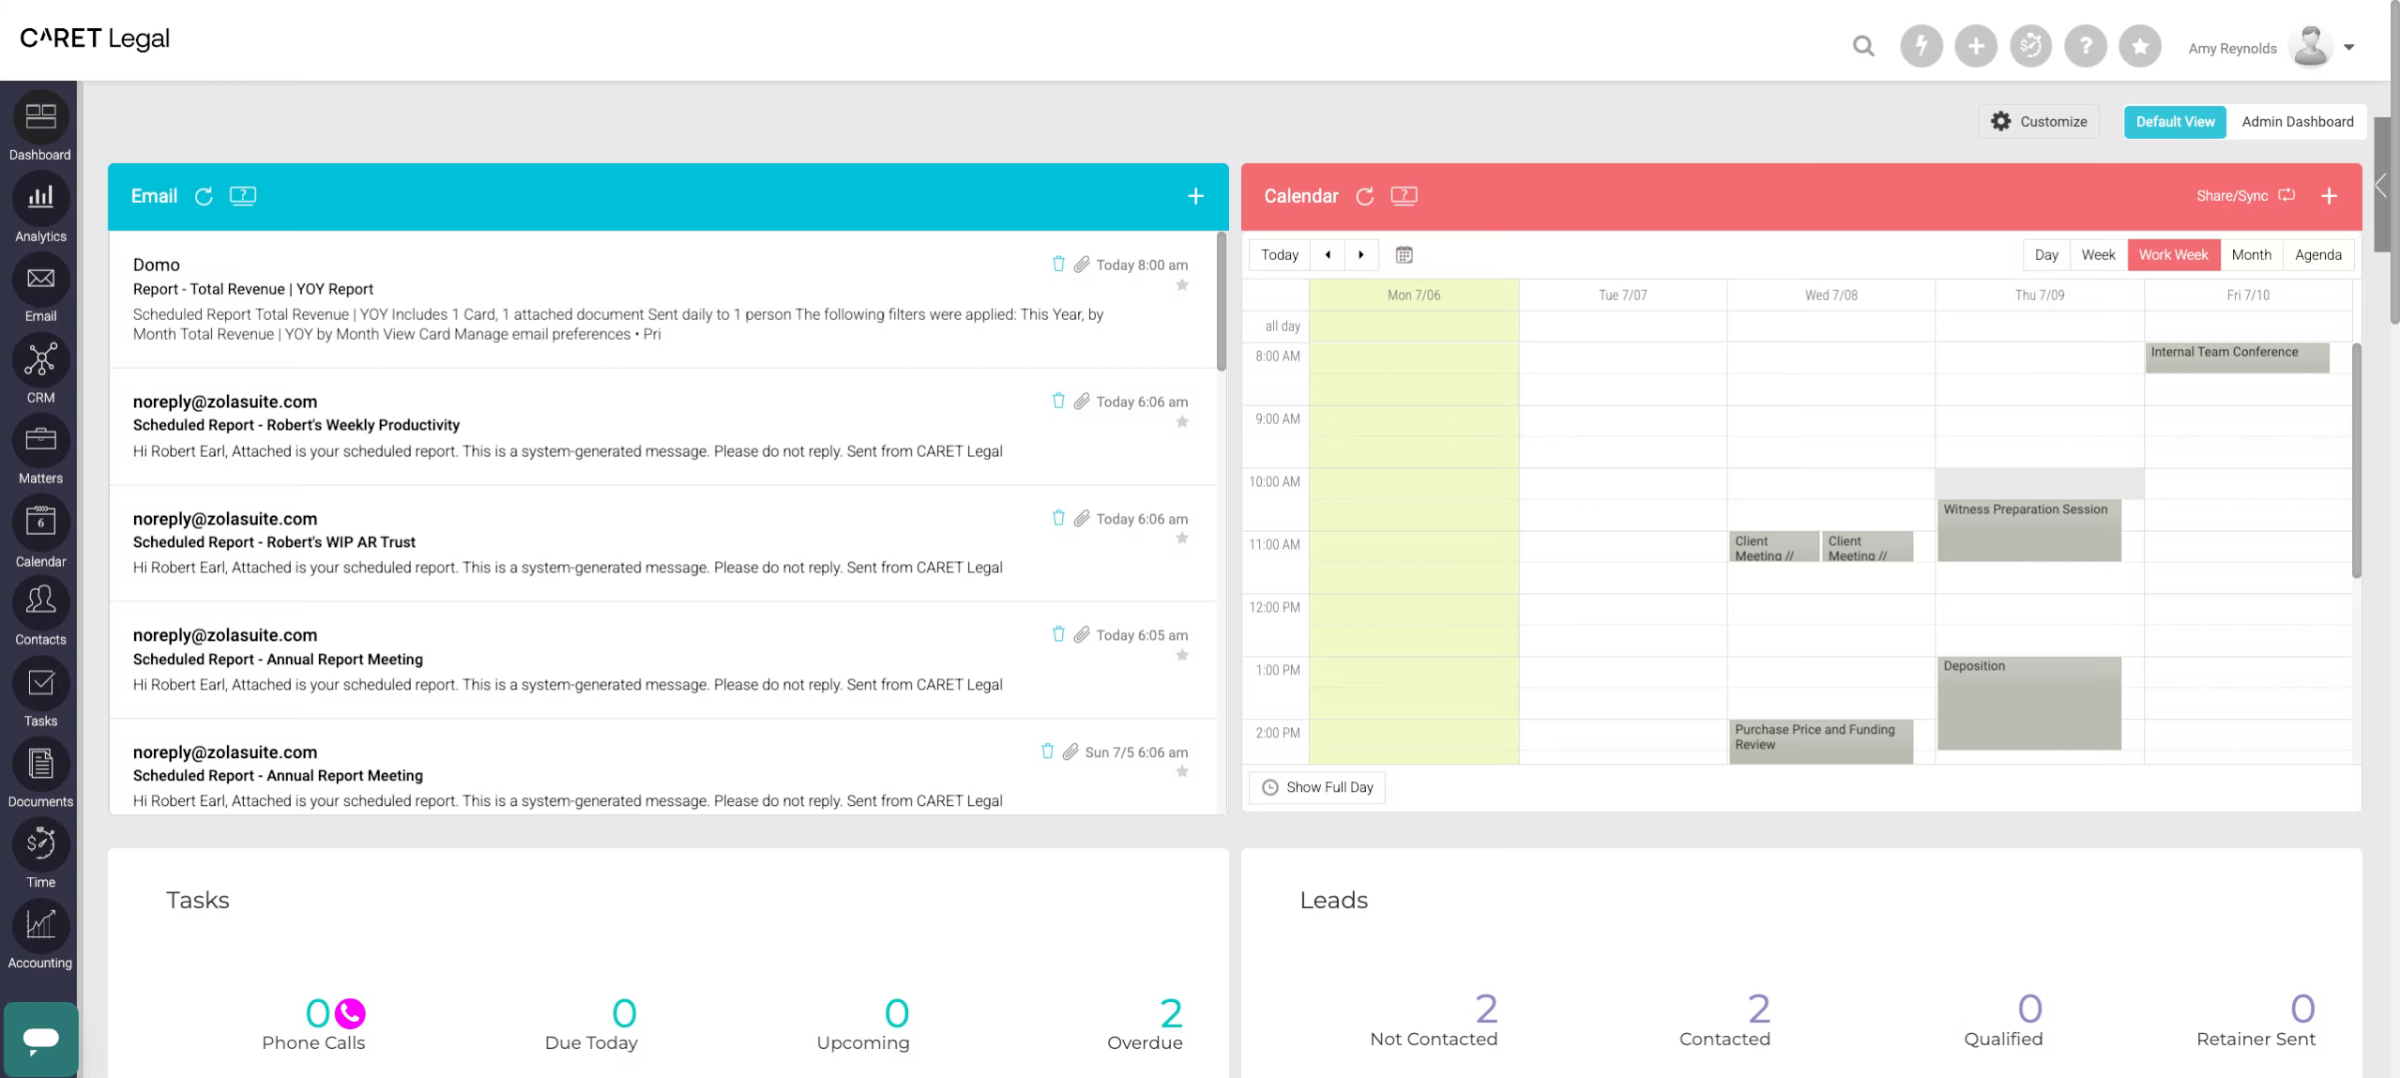
2. Open Legal Dashboard
Click on the main area of the CARET Legal Dashboard to start accessing your timekeeping tasks. This action opens the interface where you can manage your billable time entries.
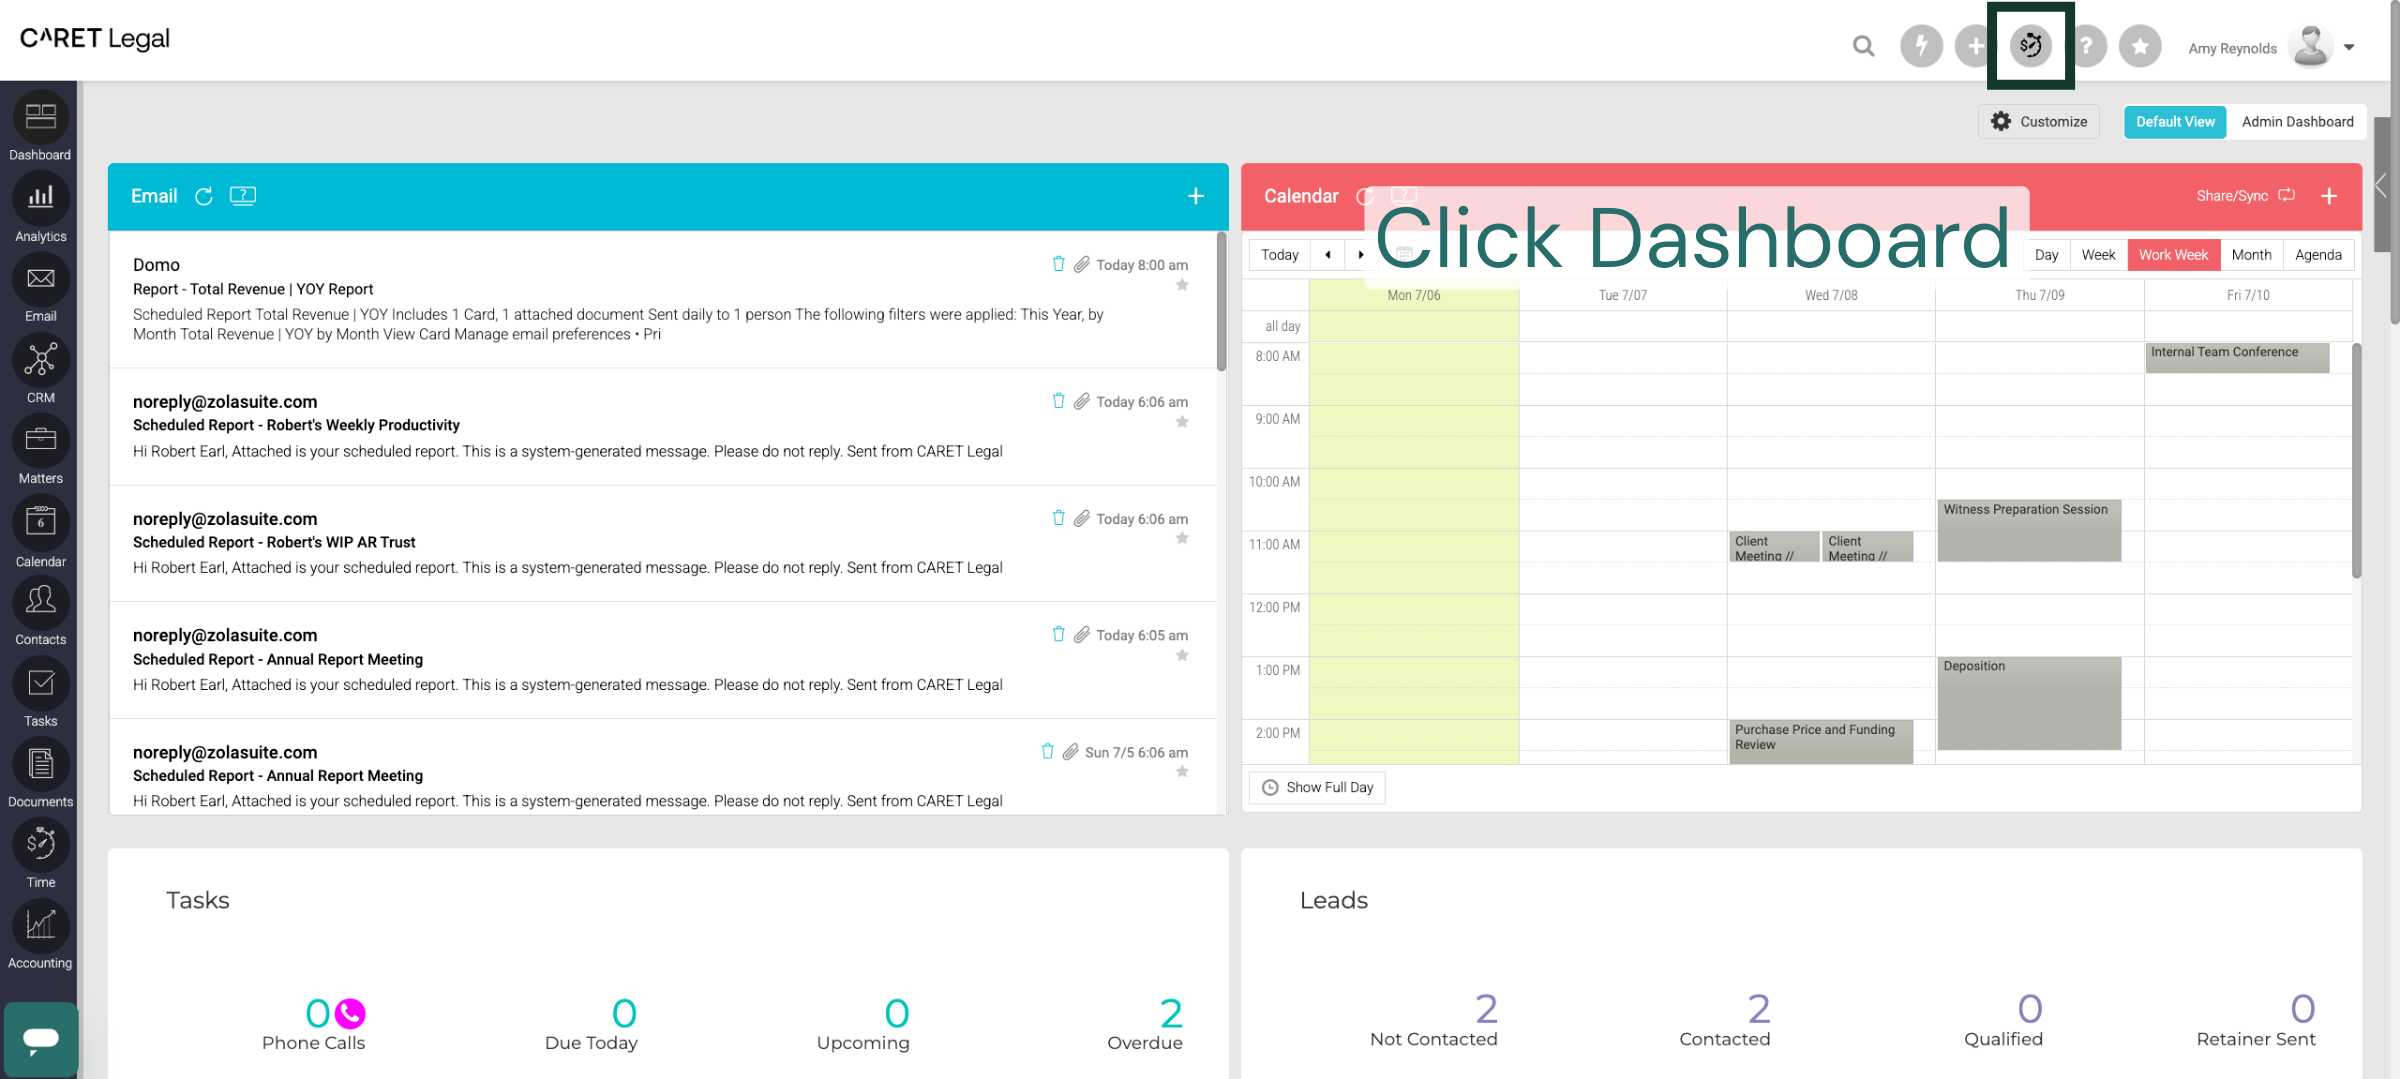
3. Access Review Backlog
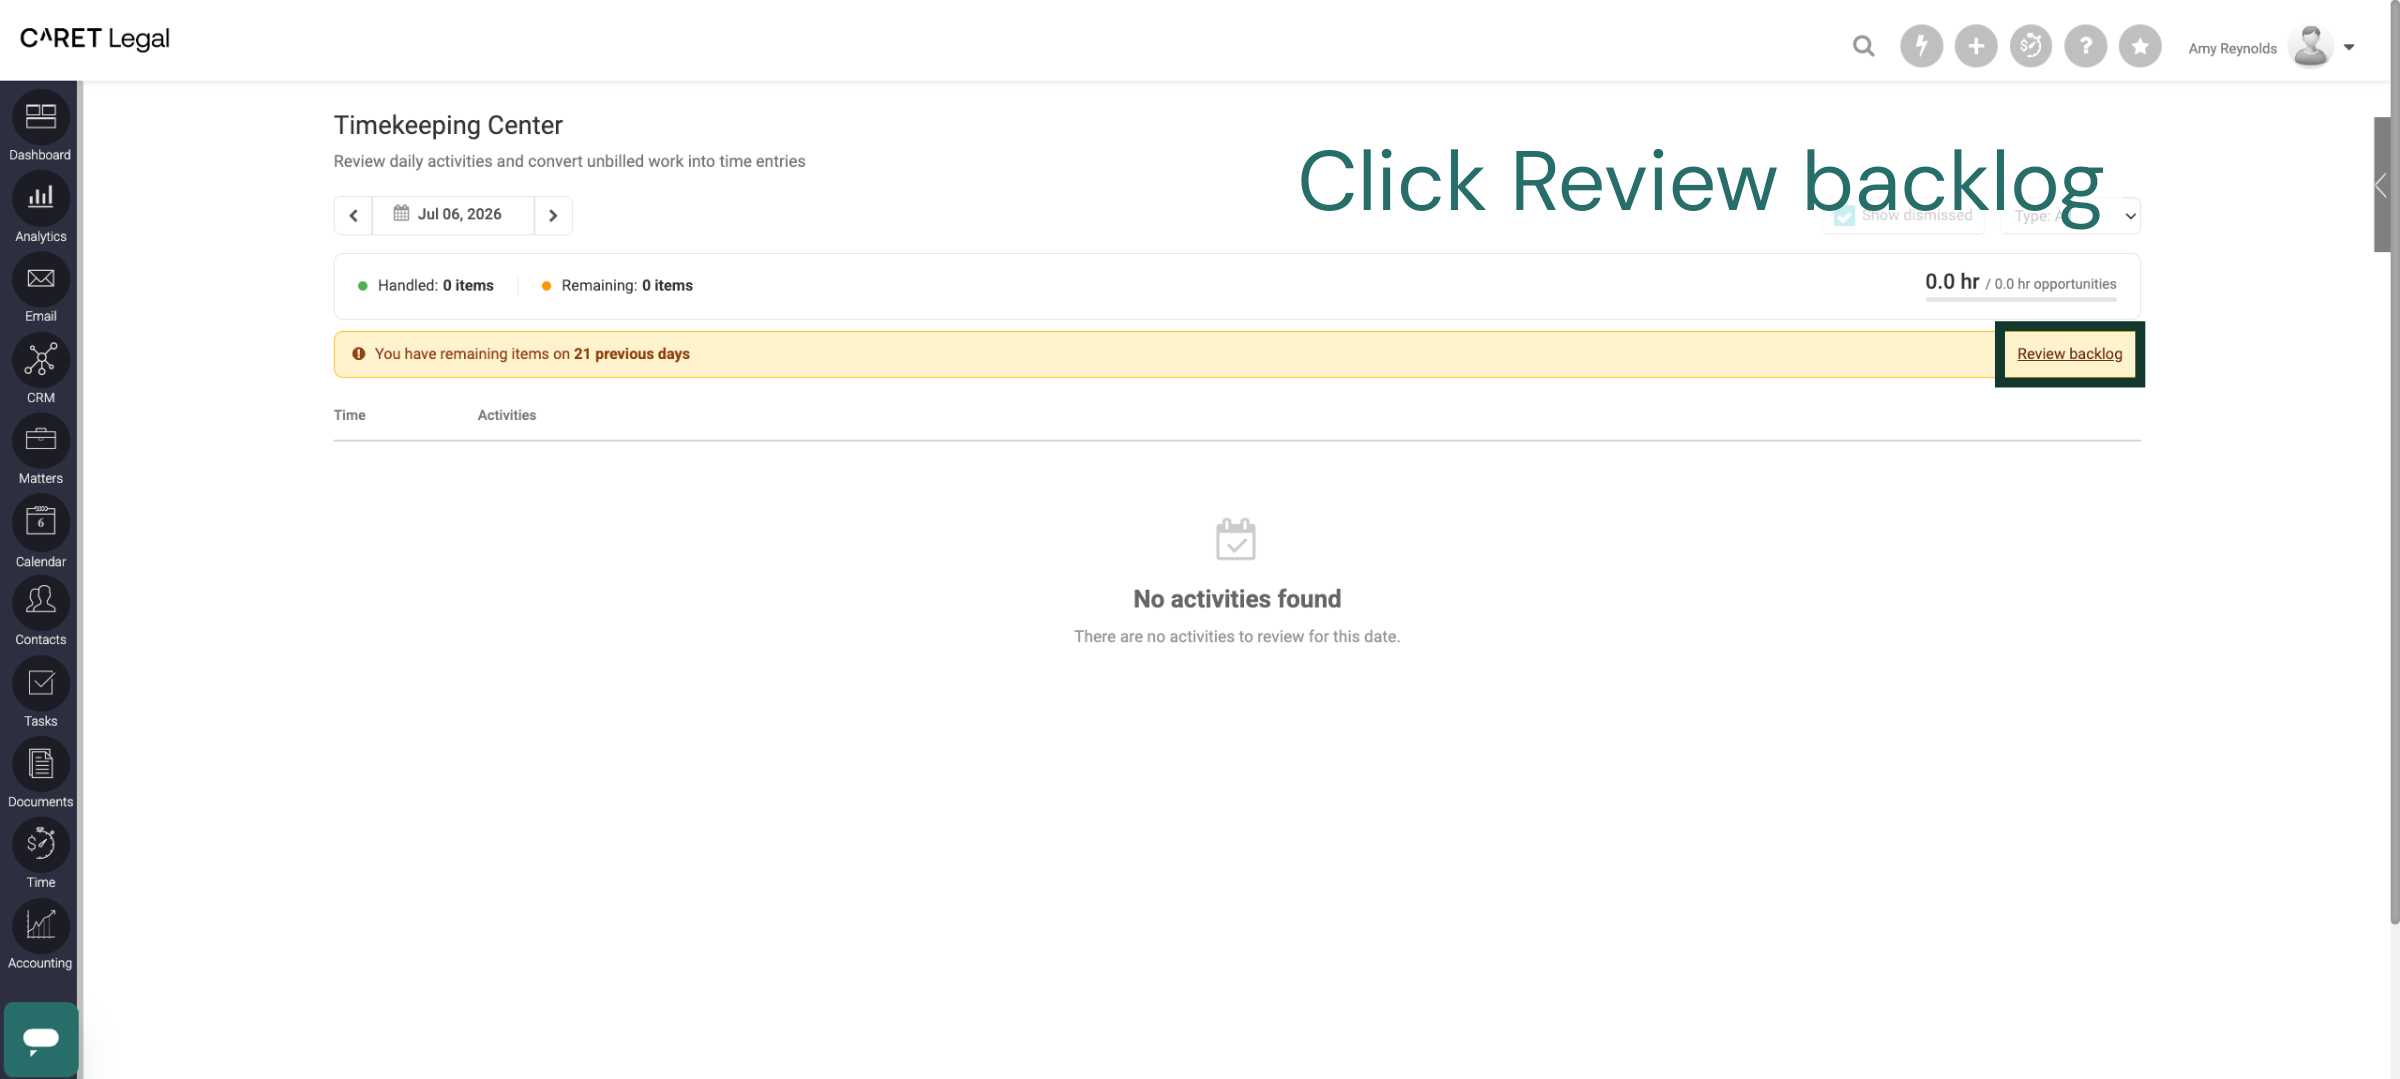
Select the "Review backlog" option in the CARET Legal Timekeeping Center to view pending time entries or to review the daily activities that require your attention. This will help you prioritize your work more efficiently.
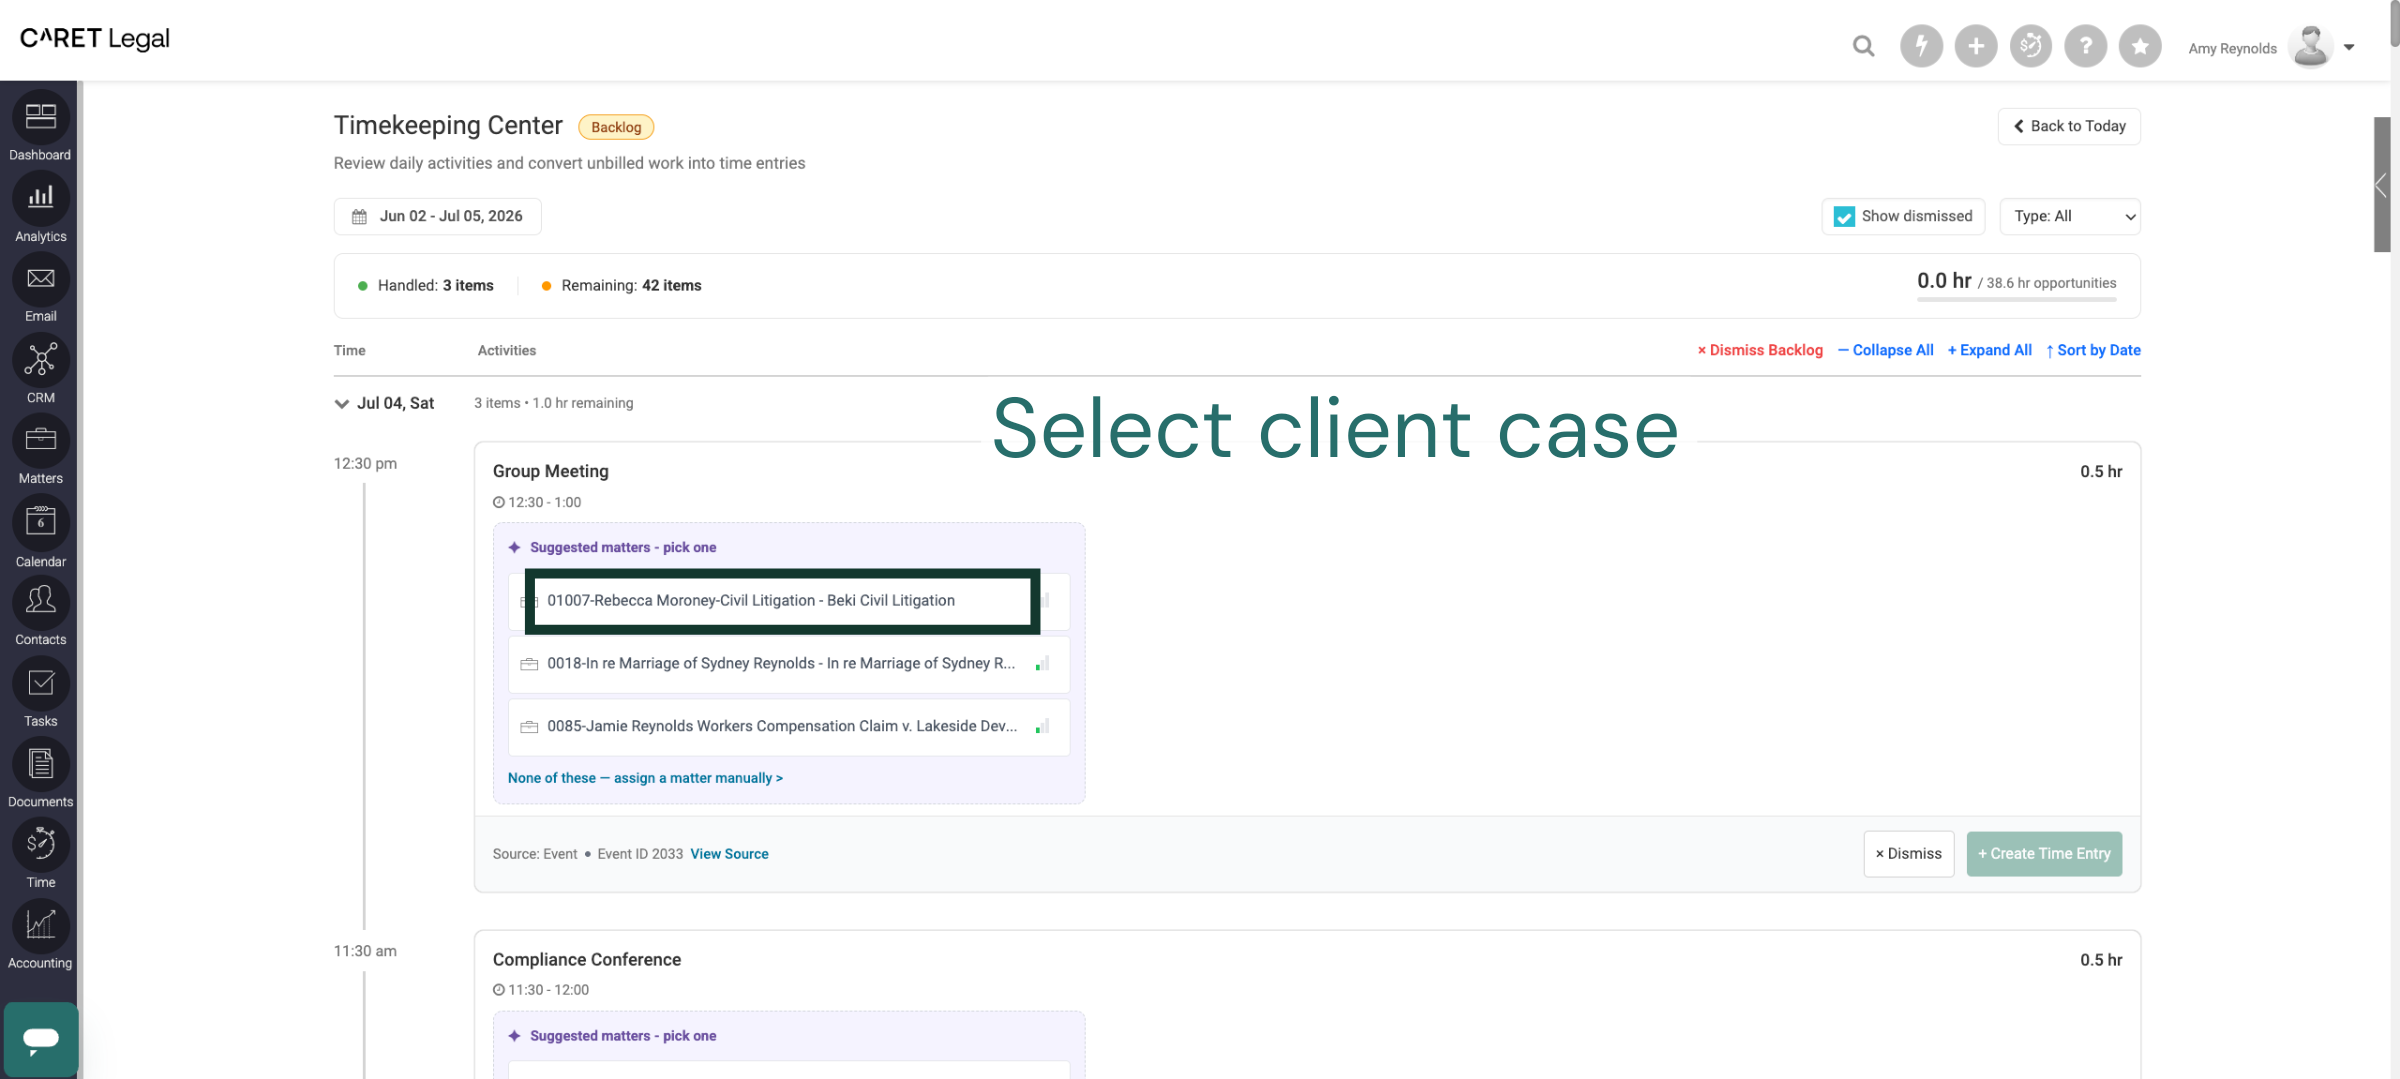
4. Choose Client Case
Click to select a client case from the list in the CARET Legal Timekeeping Center. This enables you to concentrate on specific case details and associated time entries.
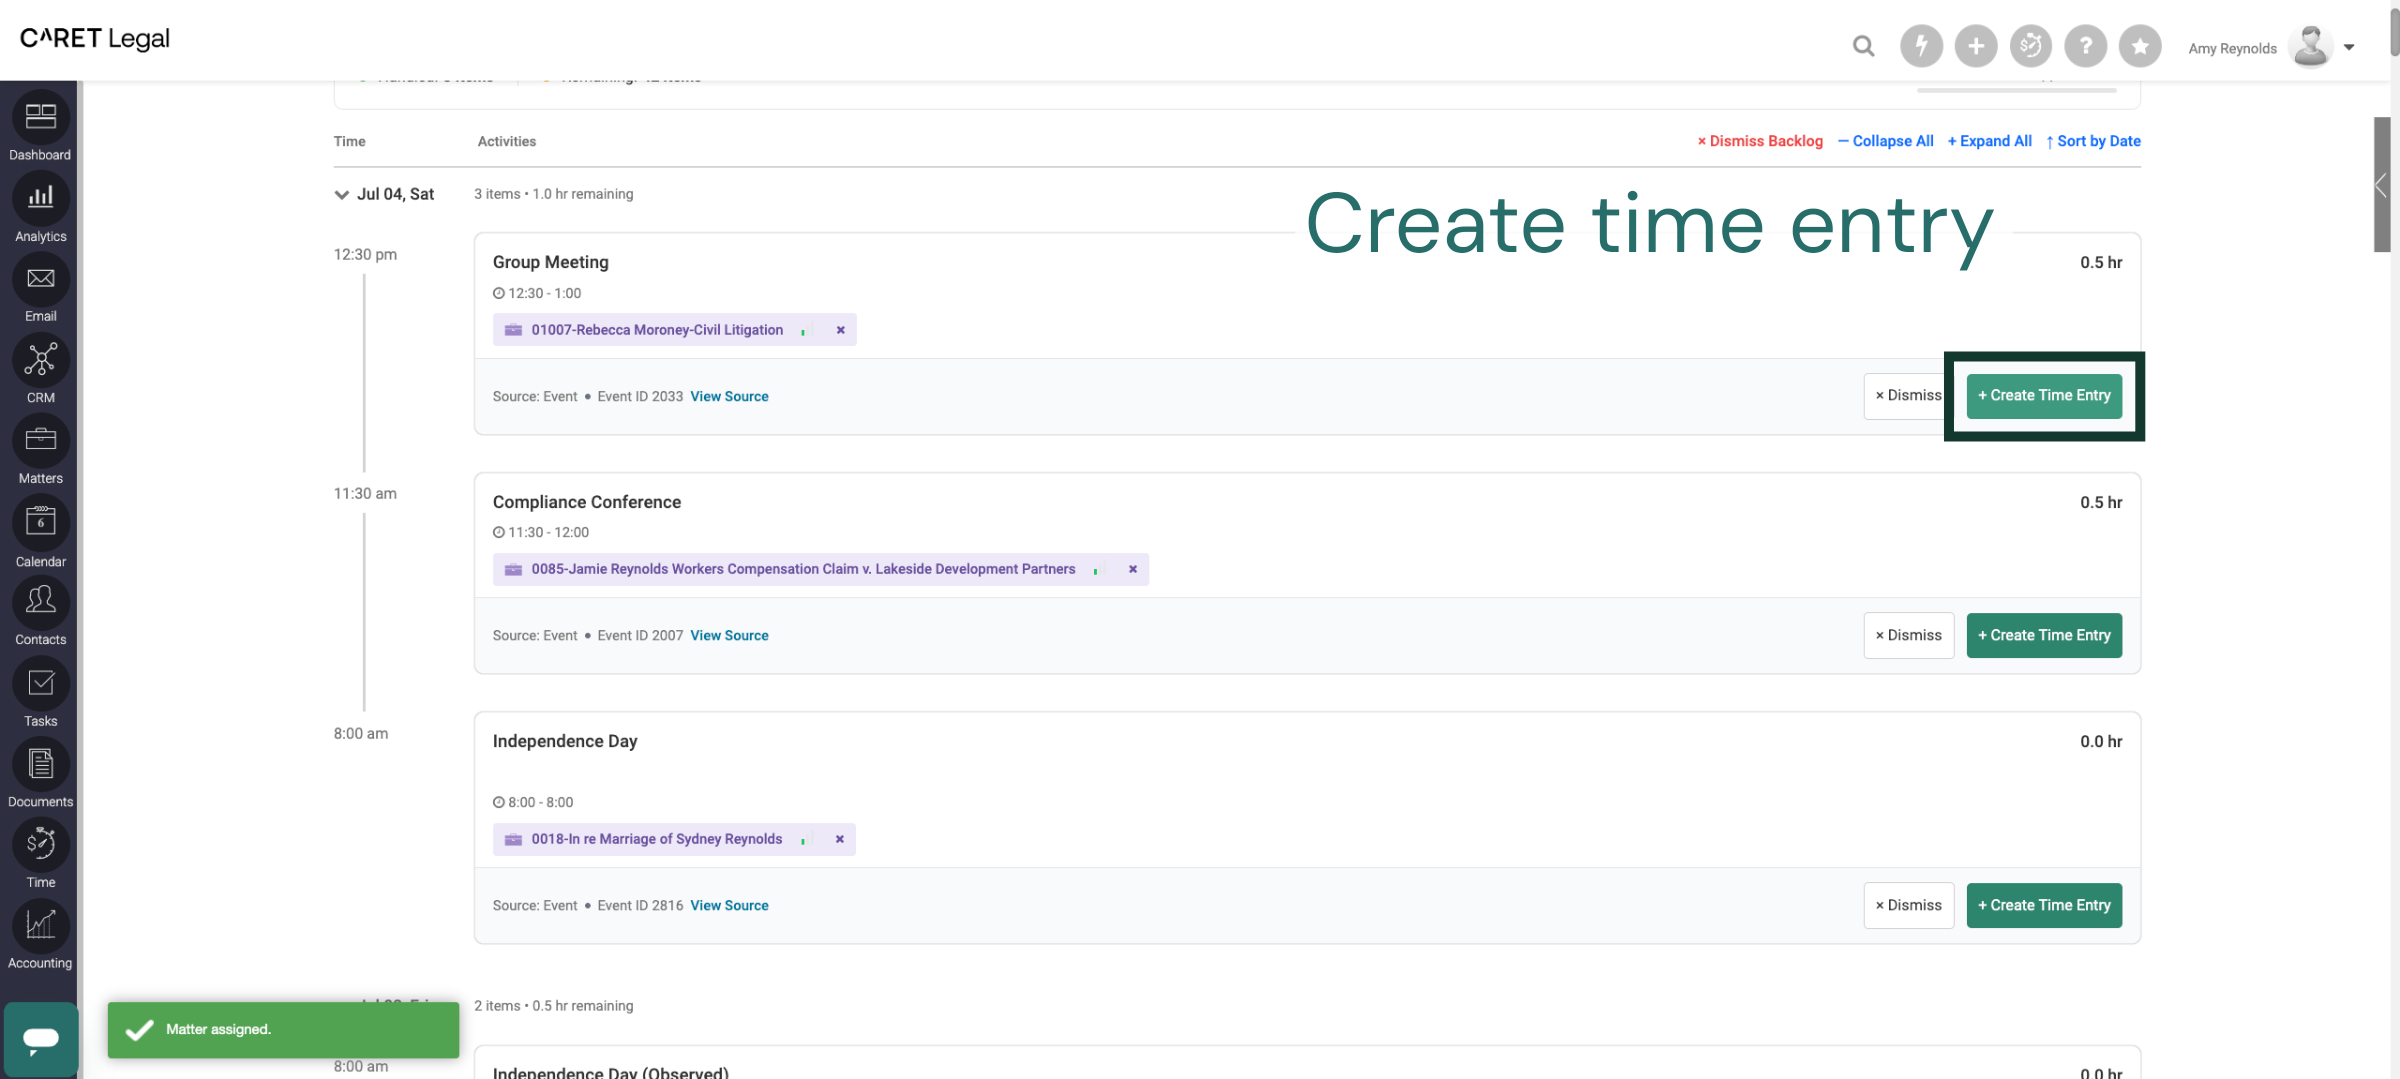
5. Create New Time Entry
Click the + Create Time Entry button to begin logging a new time record for your legal work. This action starts the process of adding detailed time information.
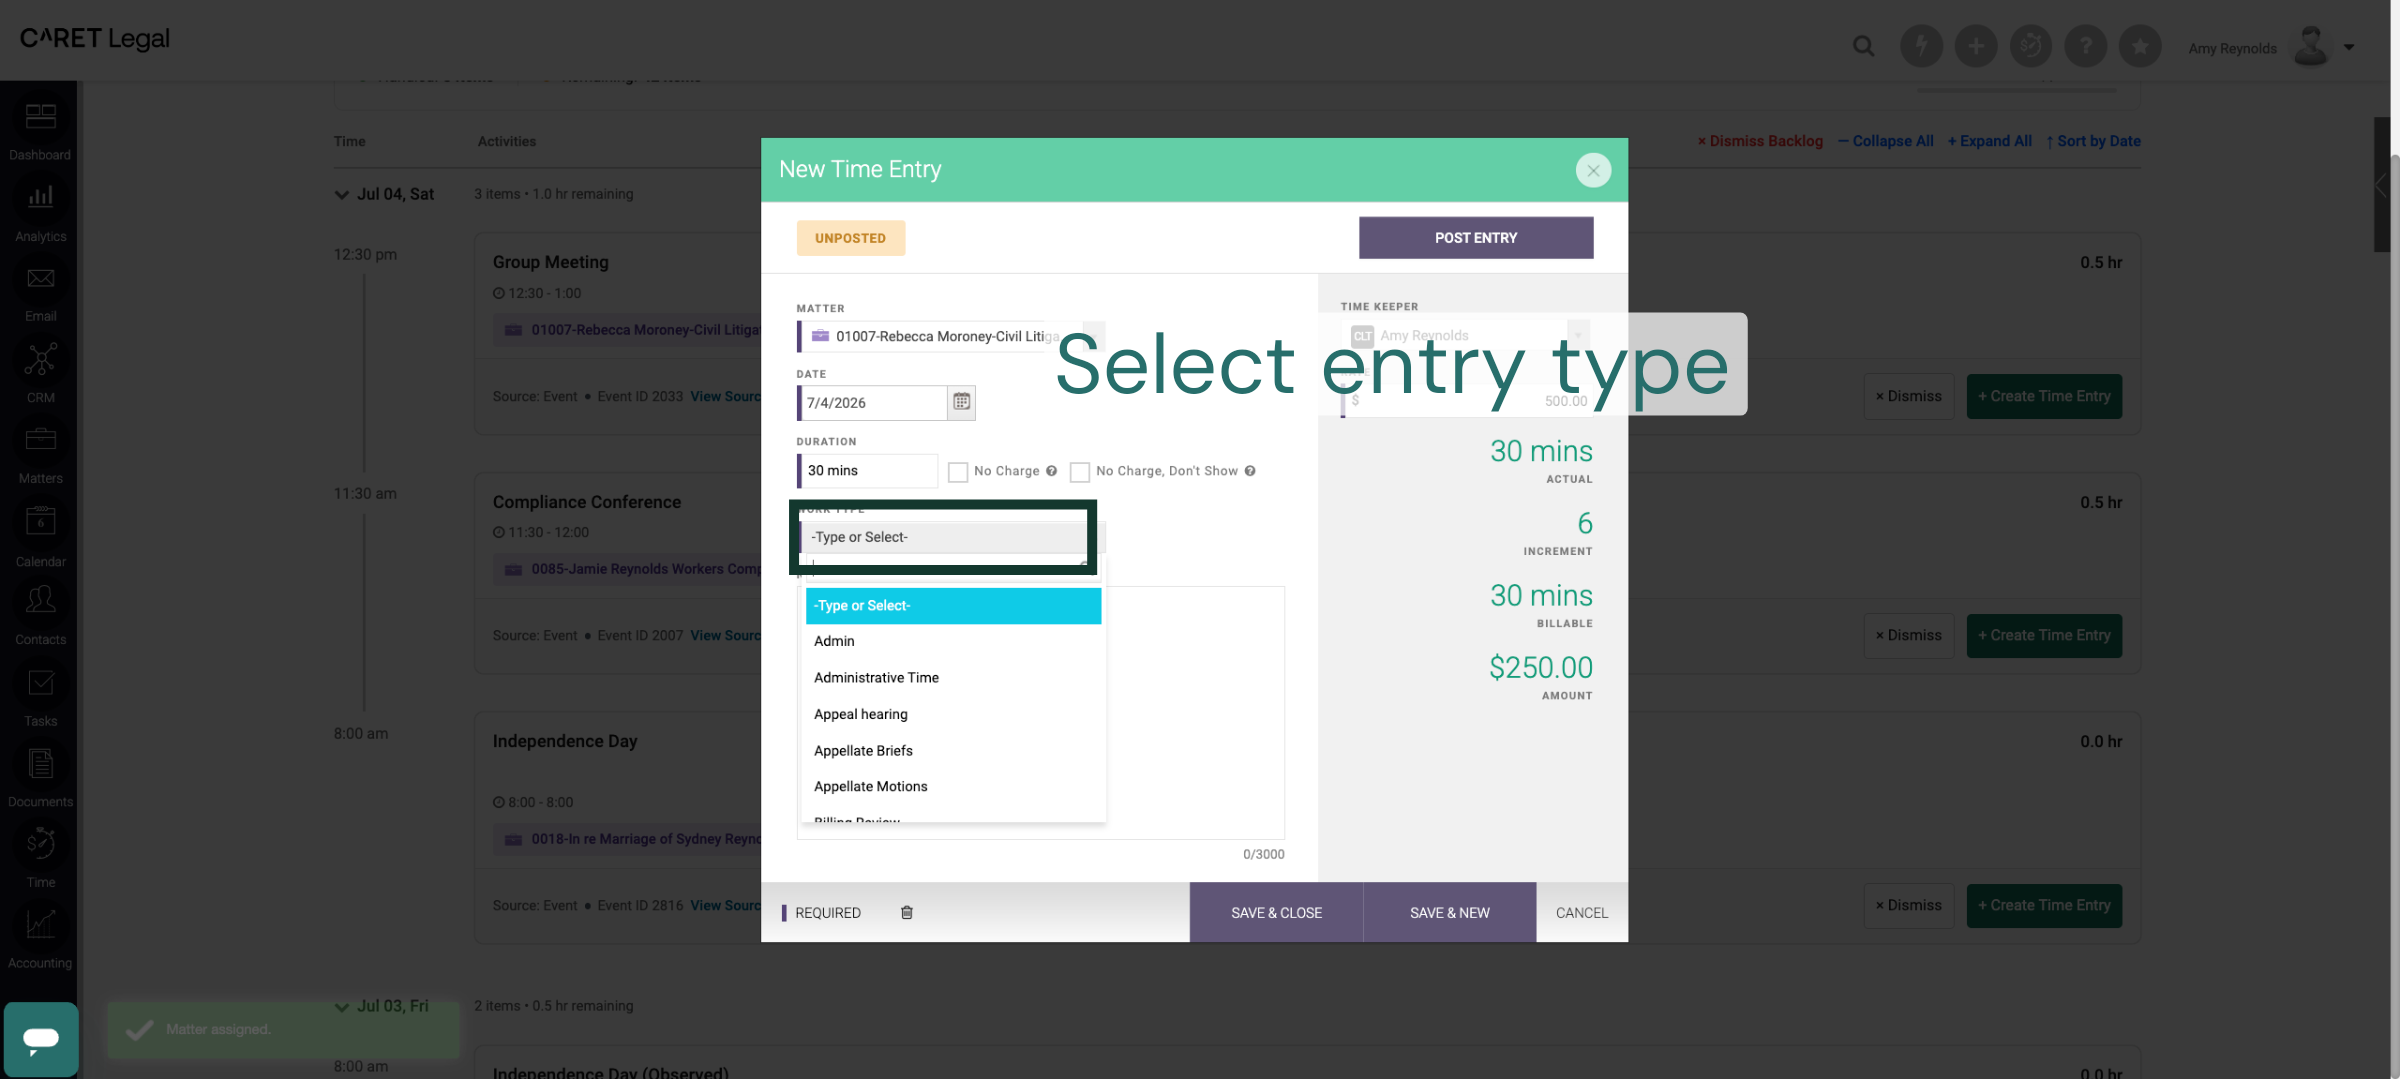
6. Select Time Entry Type
Click the "Type" or "Select" dropdown to choose the category that best describes your time entry. Proper categorization ensures accurate billing and reporting.
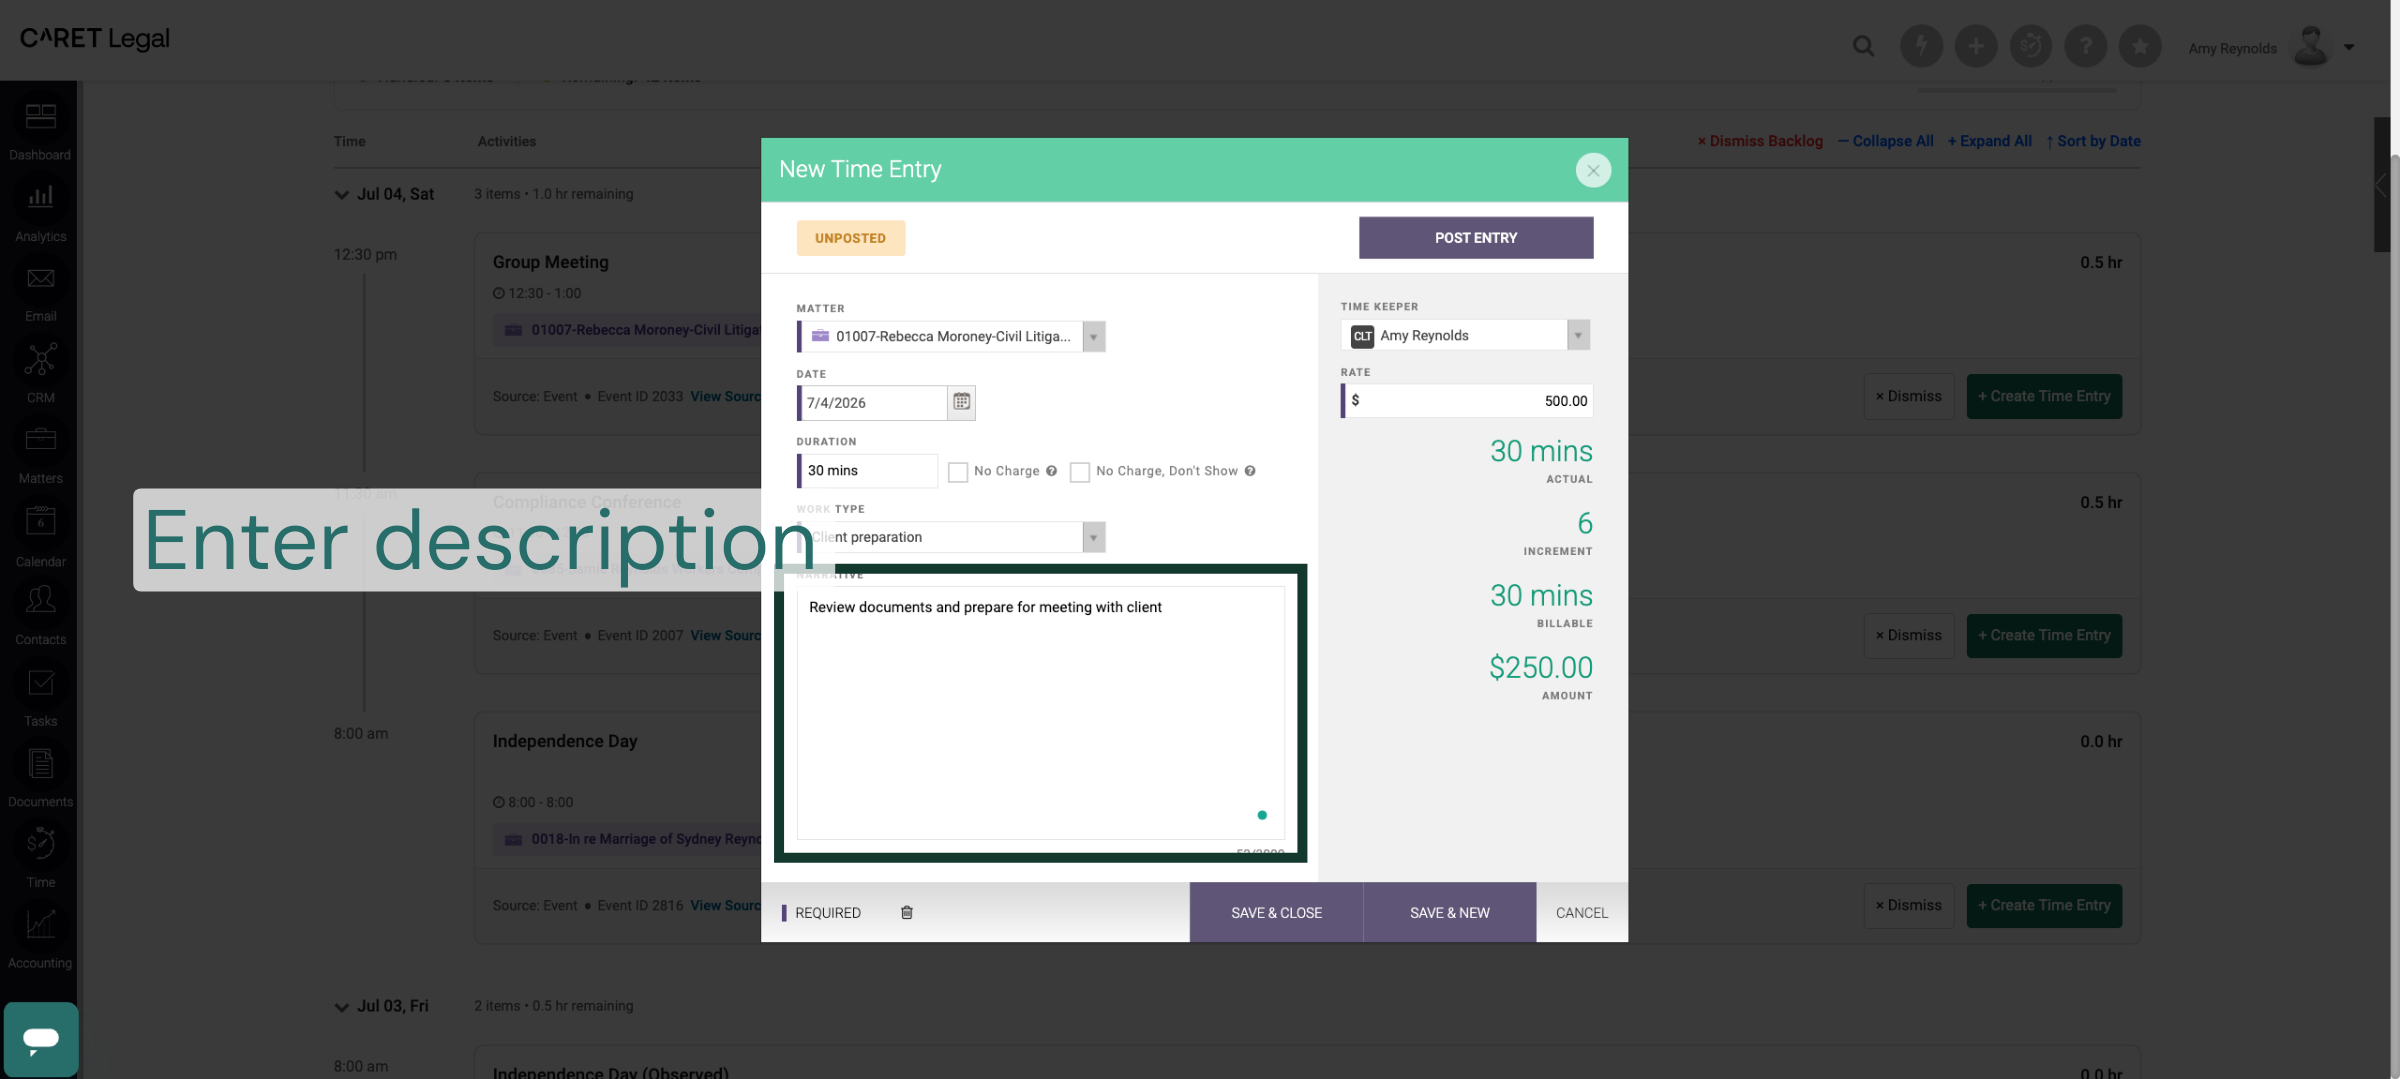
7. Enter Time Entry Description
Please provide a detailed description of the work completed, including tasks such as document review and preparation for client meetings. Clear descriptions enhance record clarity and ensure accurate billing.
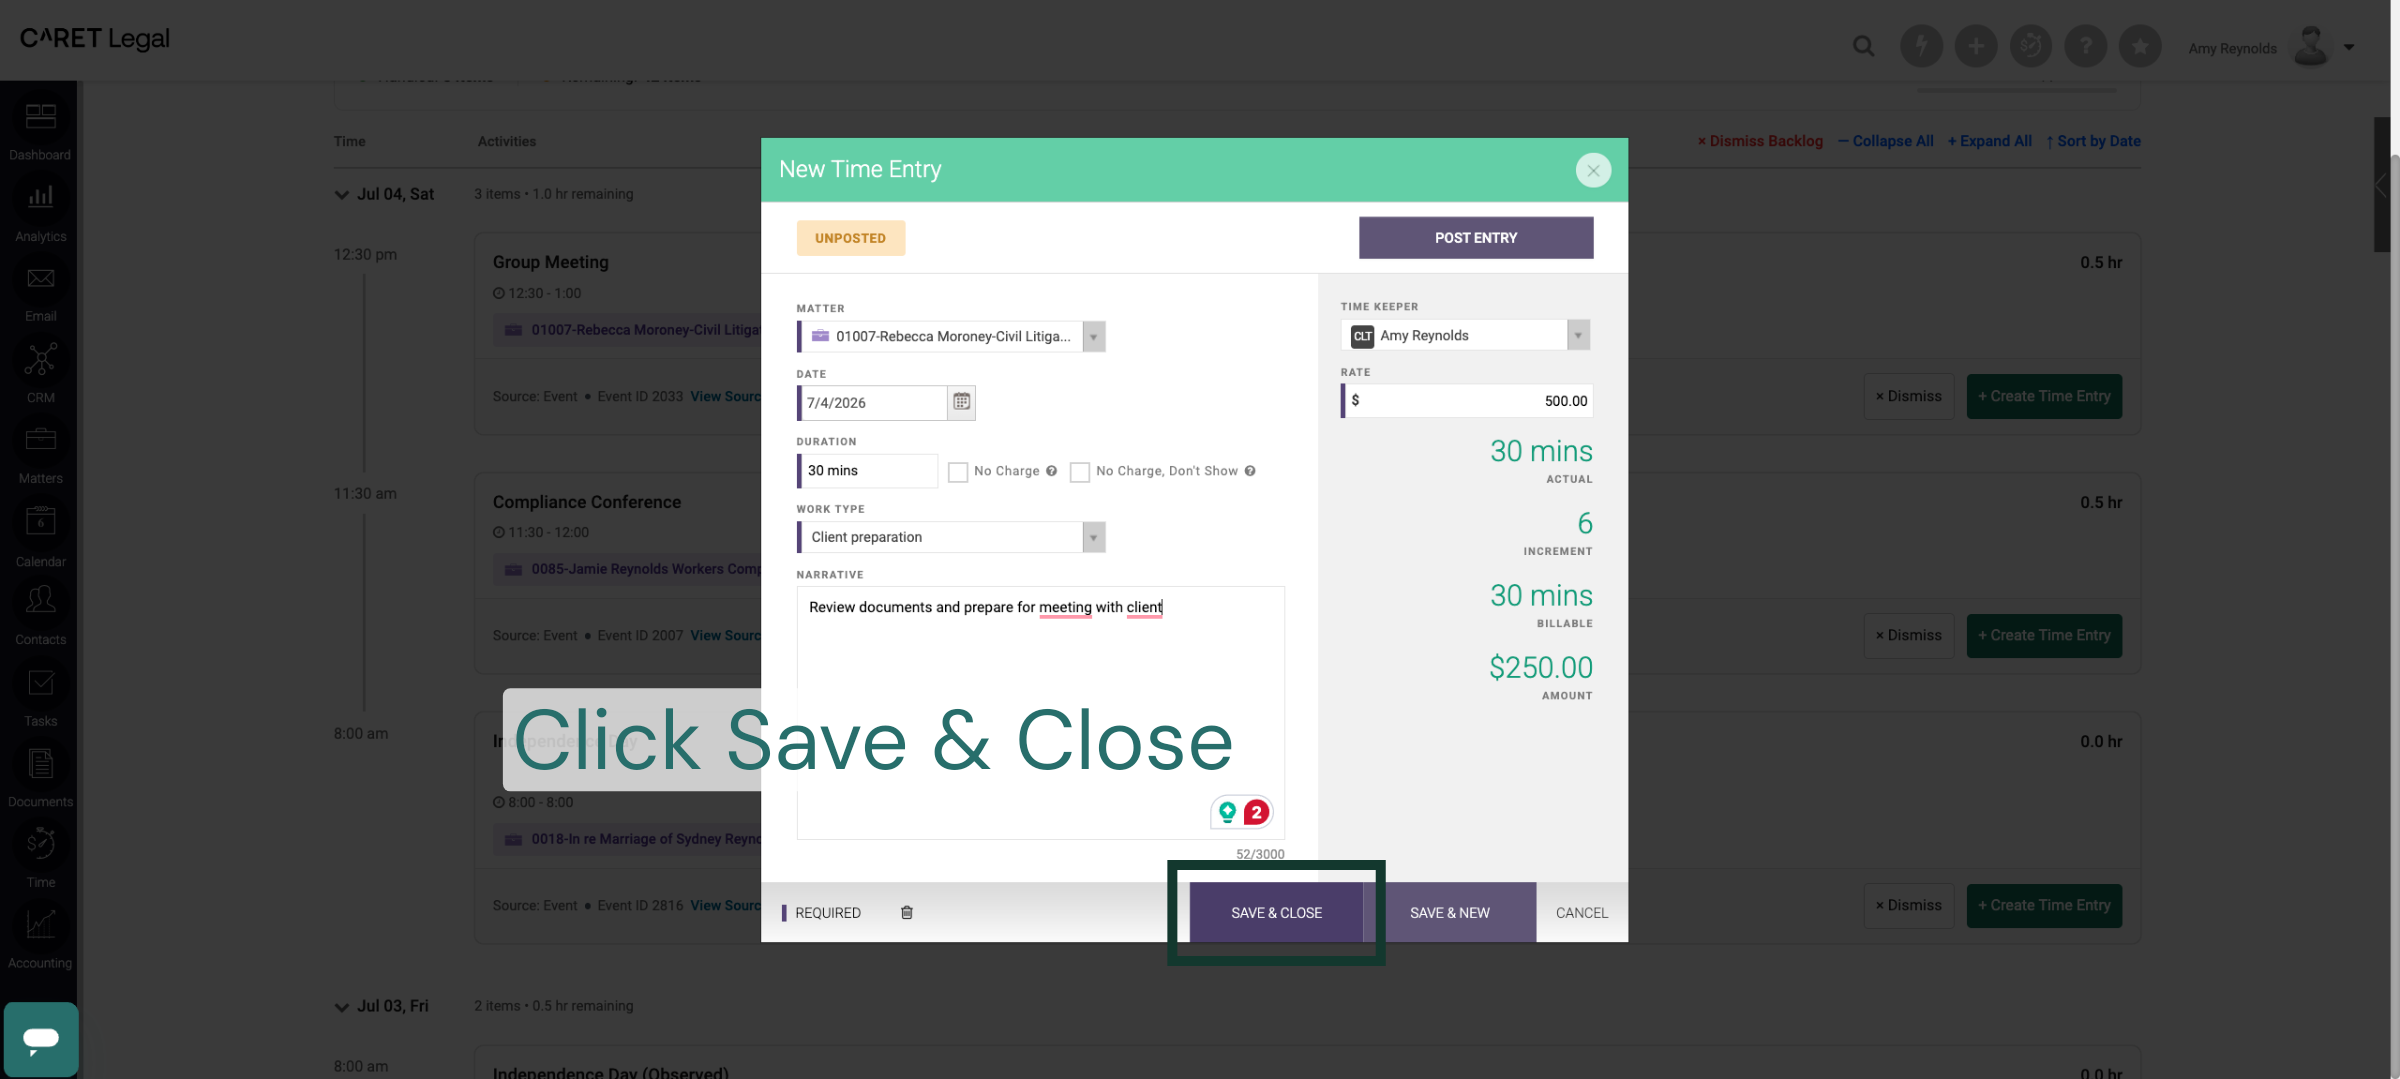
8. Save Time Entry
Click the Save & Close button to save your new time entry and exit the entry form. This action confirms your input and updates your timekeeping records.
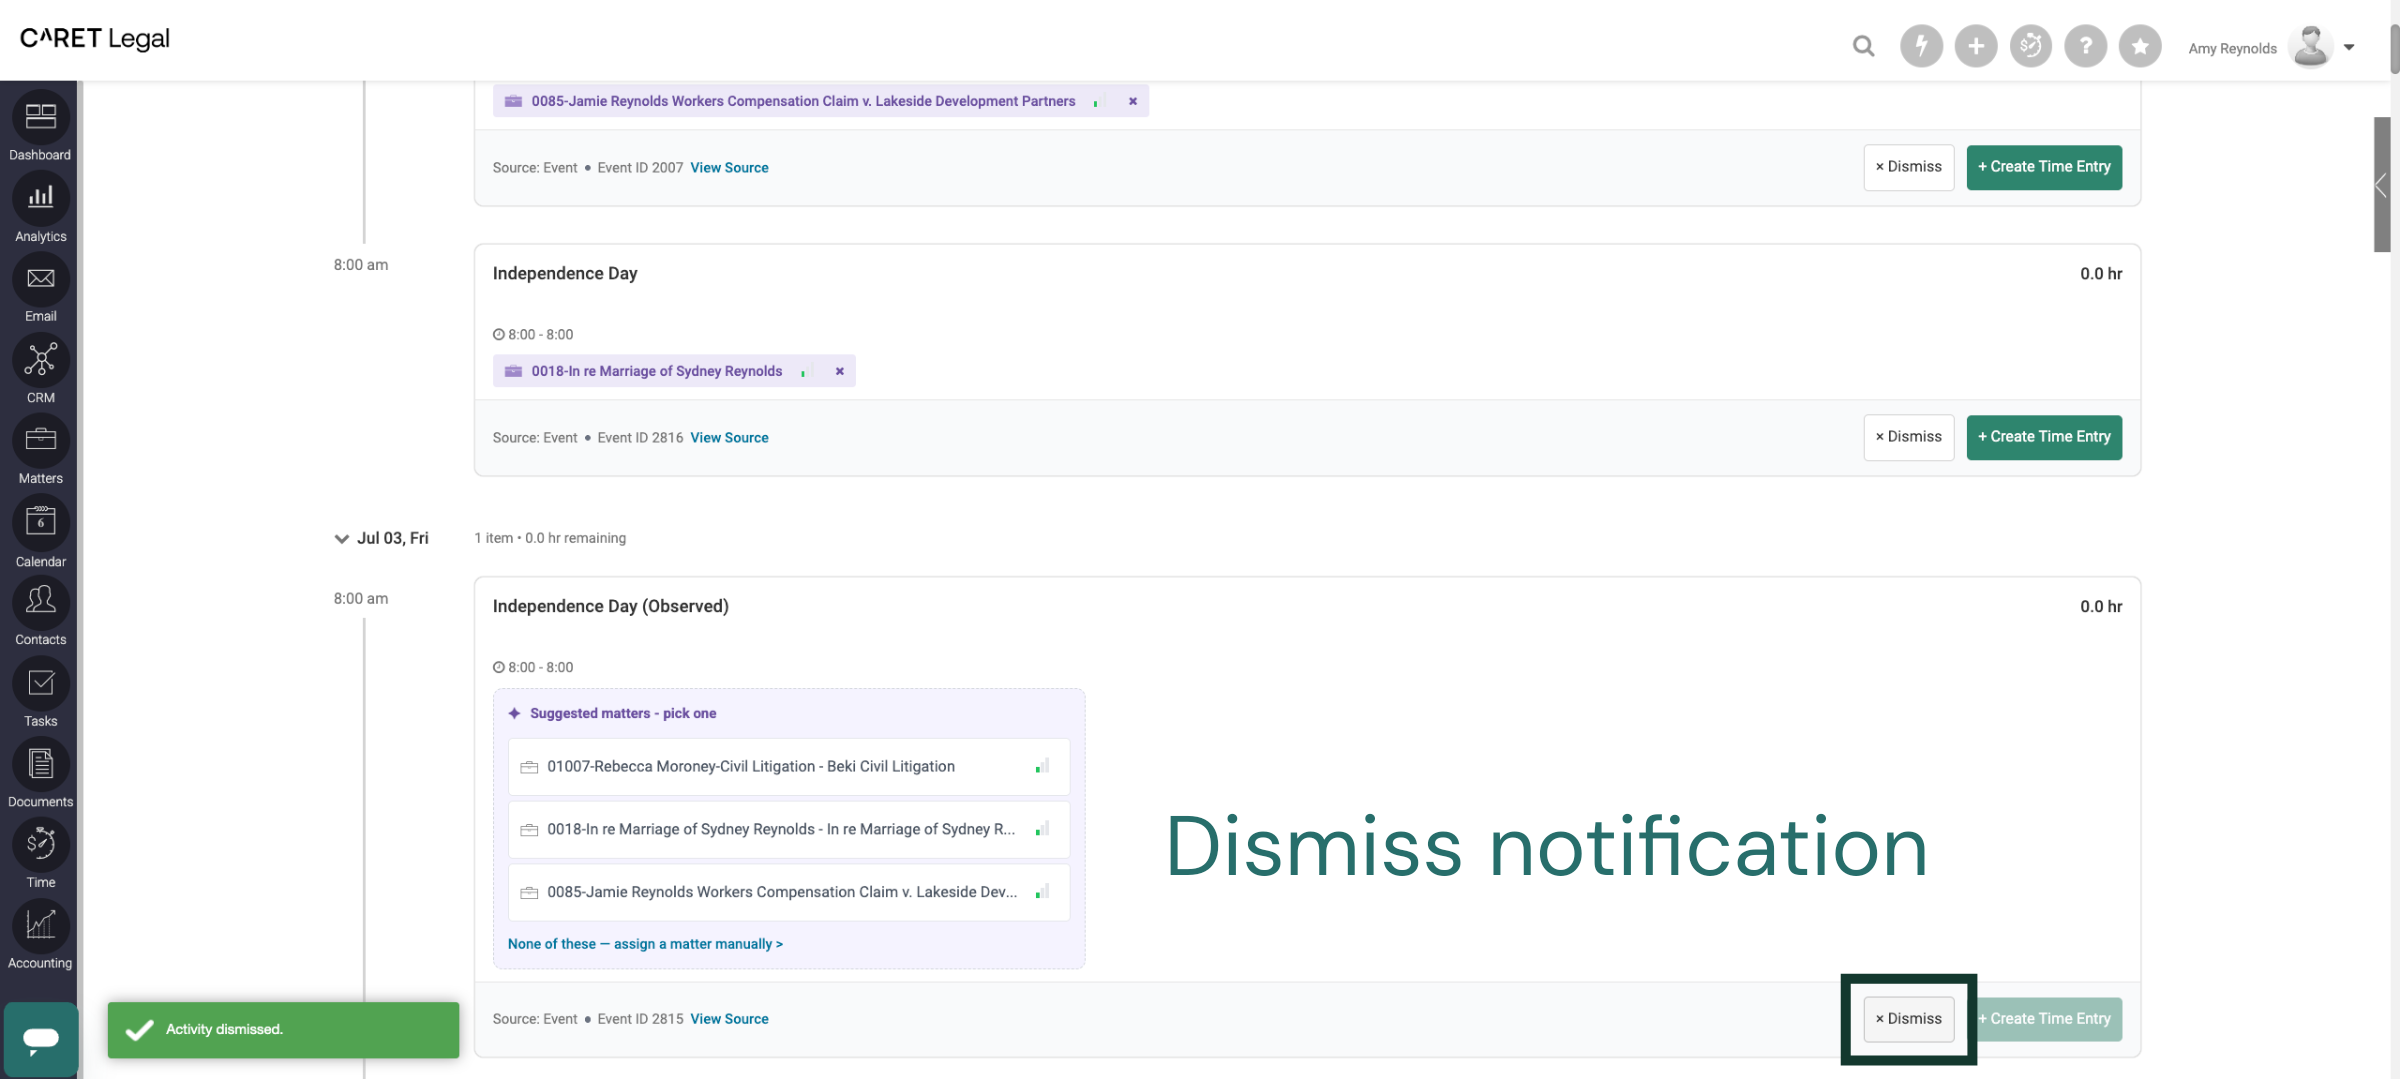
9. Dismiss Notification
Click the × Dismiss button to close any pop-up notifications in the CARET Legal Timekeeping Center. This helps maintain a clear and focused workspace.
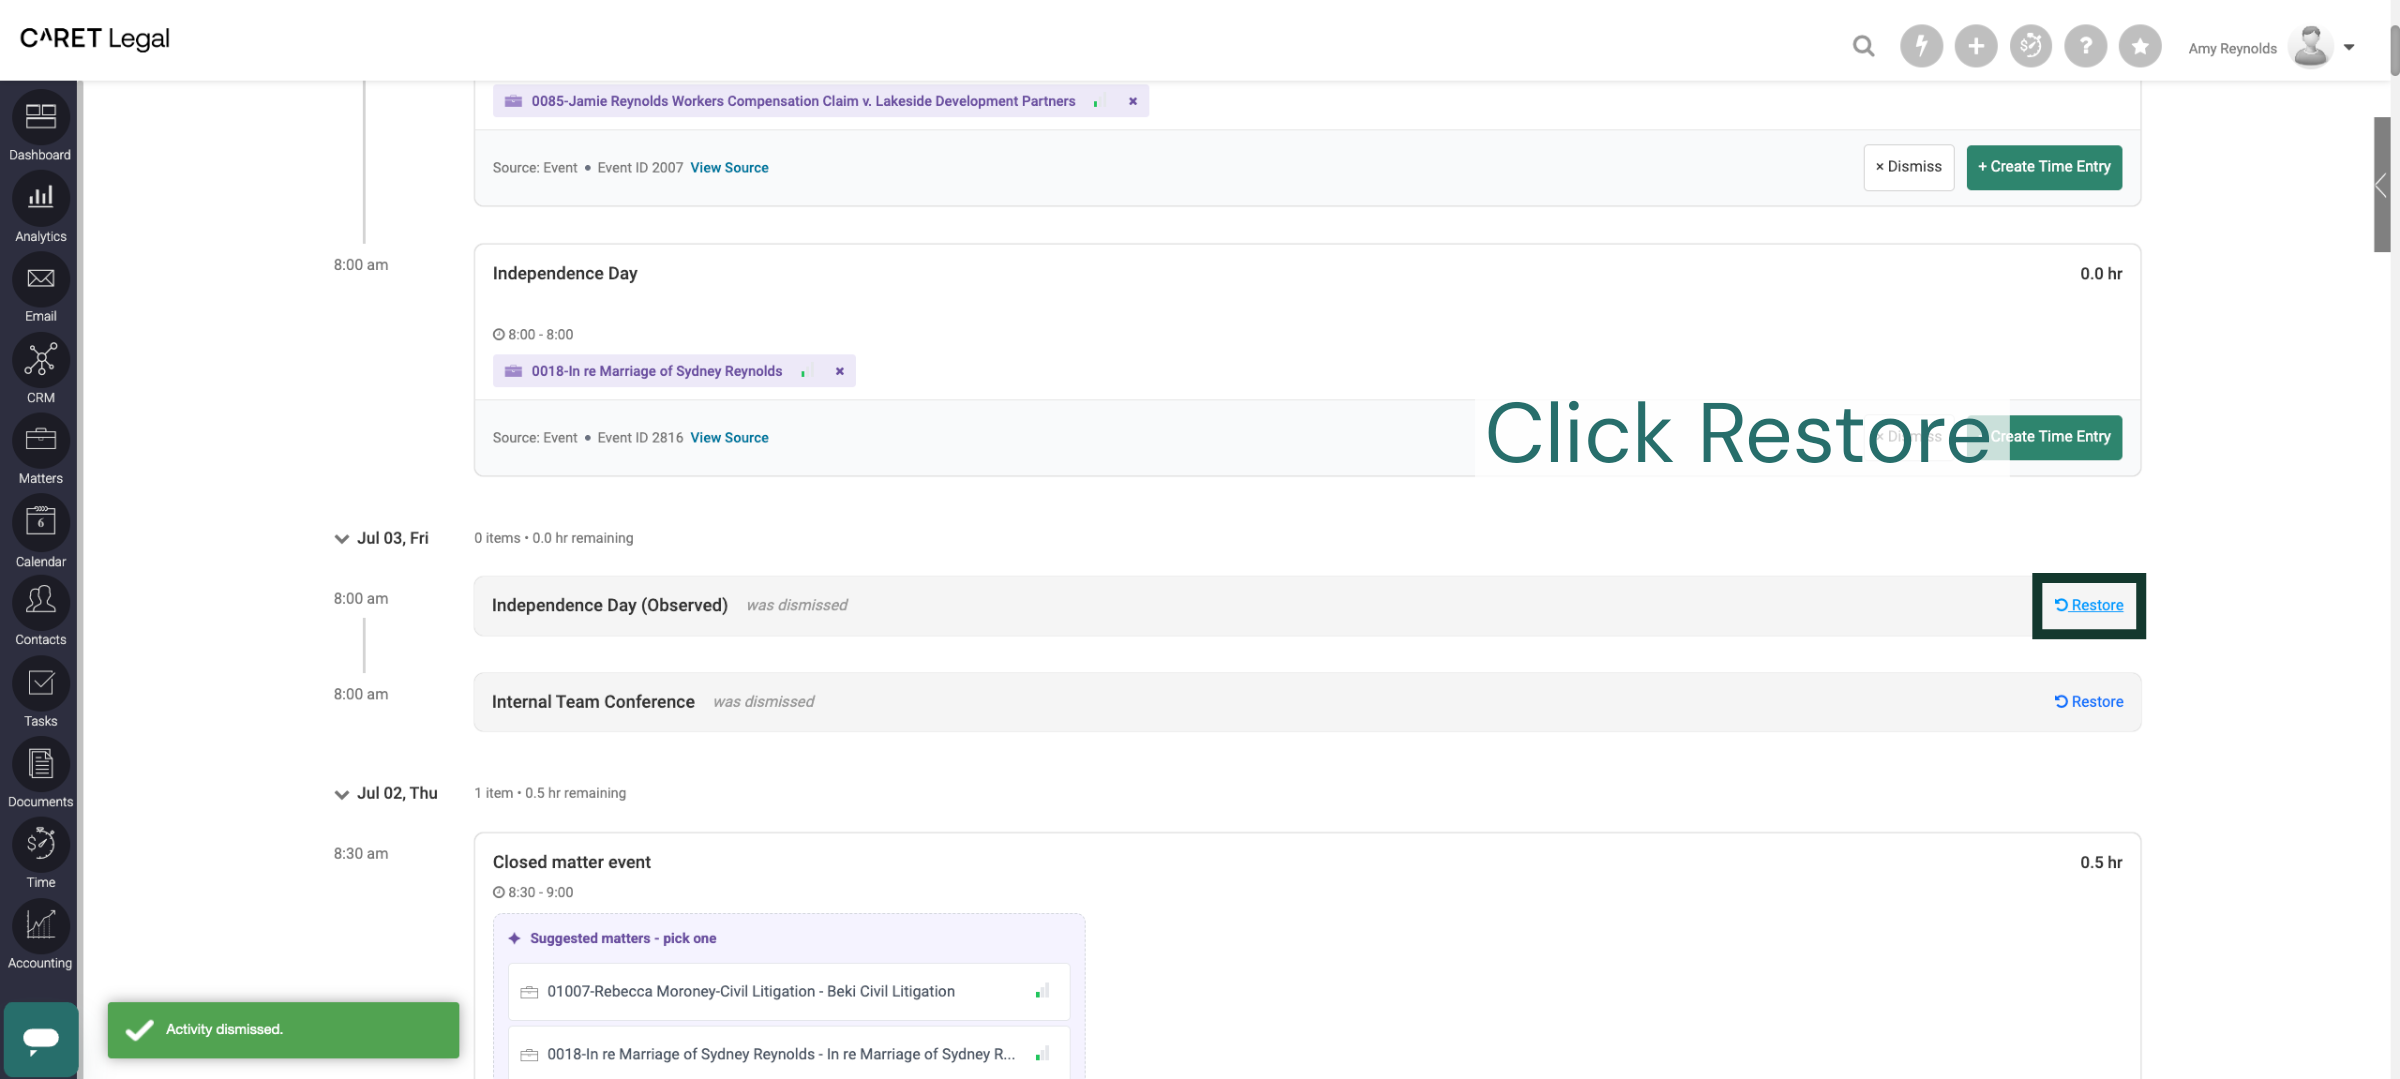
10. Restore View
Click the Restore button to revert to a previous view or setting within the timekeeping center. This action can help recover your preferred workspace layout.
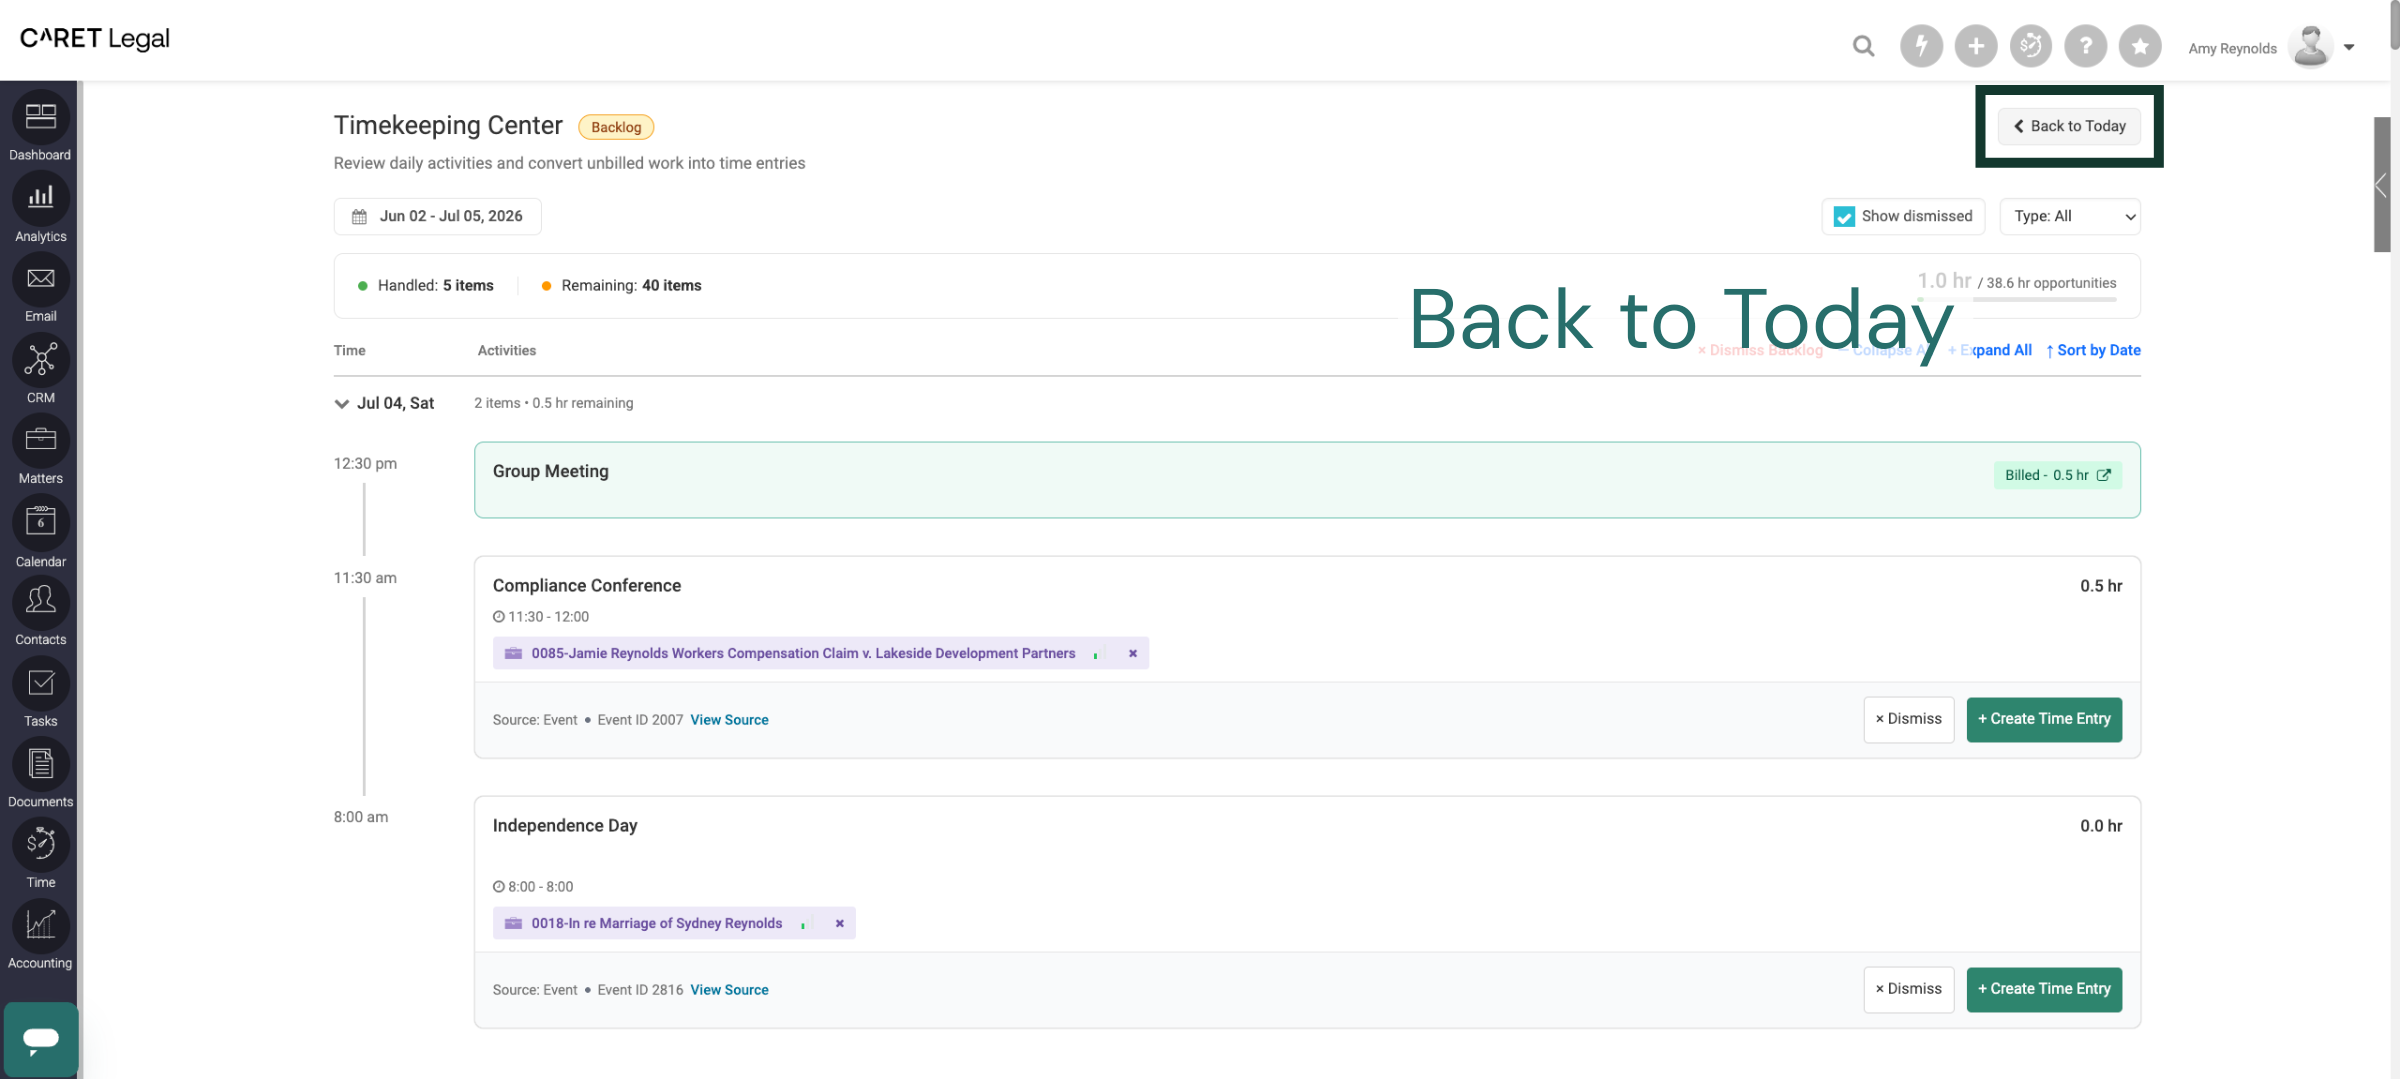
11. Return to Today
Click the "Back to Today" button to return to the current date in the CARET Legal Timekeeping Center. This guarantees that you are viewing the most relevant time entries.
You have effectively managed your time entries by reviewing backlogs, creating new entries, and navigating the CARET Legal Timekeeping Center. For further assistance, please explore additional tutorials on advanced time management features.