The Bulk Billing Center allows you to automatically print or blast email all of your clients whose billing preference is set to Email PDF with their respective invoices or statements of account.
Emails with the Invoices attached will be sent to the billing contact listed on the Invoice’s Matter.
Before you can start using CARET Legal's Bulk Billing Center, you will need to verify your domain.
Complete the Bulk Billing Center wizard.
- Navigate to the Accounting section, then click Bulk Billing Center under the Invoices and Payments tab.
- Click Email or Print under the Select Bulk Action section for your invoices/statements.
- Select Invoices or Statements of Account under the Select Invoices / Statements section. (Statements are only sent to those who do not have a new invoice in the given date range, but they do have an outstanding balance.)
- Select the Exclude invoices that have been previously sent checkbox. If this is not enabled, any invoices that were sent out in the given date range will be sent again.
- Enter an option in the Select Date Range field and click Next >.
- The next screen allows you to Set Filters for your invoices/statements by Responsible Attorney, Practice Area, Matter, Client, or Billing Group.
- Click Next > to Review Invoices & Statements that are included in this batch.
- You can click into the Matter or Invoice directly from this window, then click Next >.
- The final screen before allows you to customize your Message.
- You can change the Sending Email Address. This can be your email address or an email address you have designated for accounting purposes.
- You call also customize the Subject and Body.
- Click the Copy icon to the right of the Recipient's Name and paste the merge field into the Body of your email to address this email to the recipients. This automatically inserts the primary client or billing contact’s name for each respective invoice that is to be sent out.
- A Payment Link can also be included if you are integrated with CARET Pay. Just click the copy icon to the right of the Payment link to insert it into the body of the email. When payment is made through this link, the status of the invoice will automatically be updated to be marked as Paid. (To learn more about CARET Pay click here.)
-
- Slide the Include PDF toggle to the right to enable it in order to ensure the invoices or statements will attach themselves to the emails that are about to be sent out.
- Slide the Include PDF toggle to the right to enable it in order to ensure the invoices or statements will attach themselves to the emails that are about to be sent out.
- Click Blast & Close and voila! Your invoices have been sent.
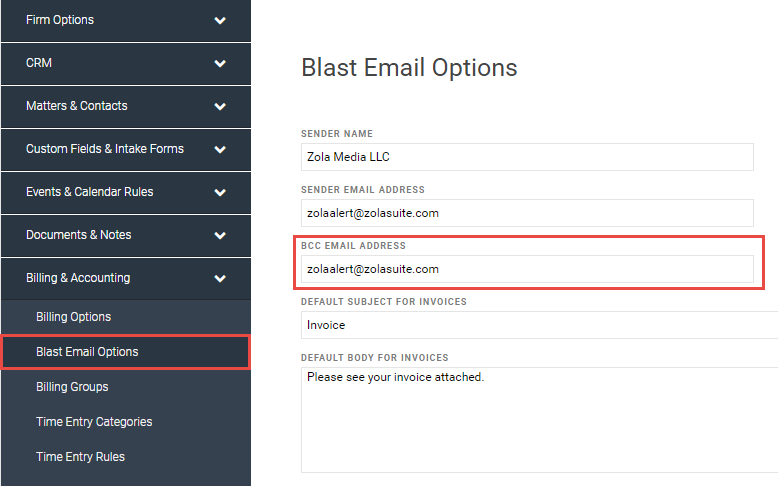
If this is the first time sending your invoices and you would like to receive a copy of each email sent, enter your email address into the BCC Email Address field within the Blast Email Options of your Firm Settings.